Your cart is currently empty!
Category: Recipes
-
Spring Garlic with Chicken – True Paleo Fare
This is a simple recipe with just a few ingredients.
- One whole five-month old rooster which has been crowing for no more than a month and butchered within the last four days
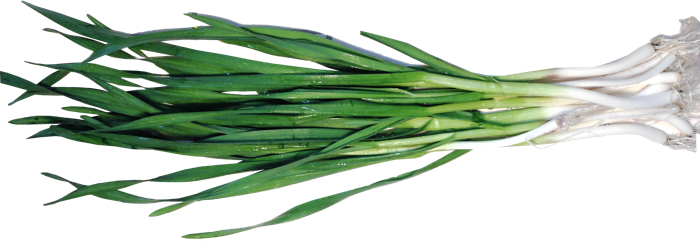
- One bunch of green garlic freshly plucked out of the garden – to grow a bunch of garlic, leave whole bulbs of garlic in the ground the summer before. Each garlic bulb will shoot up a bunch of slender garlic, perfect for dishes like this.
- Some sprigs of freshly picked oregano
- Sake or white wine
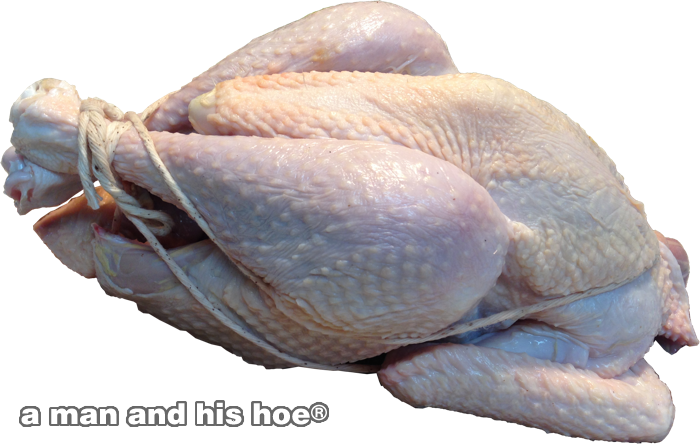
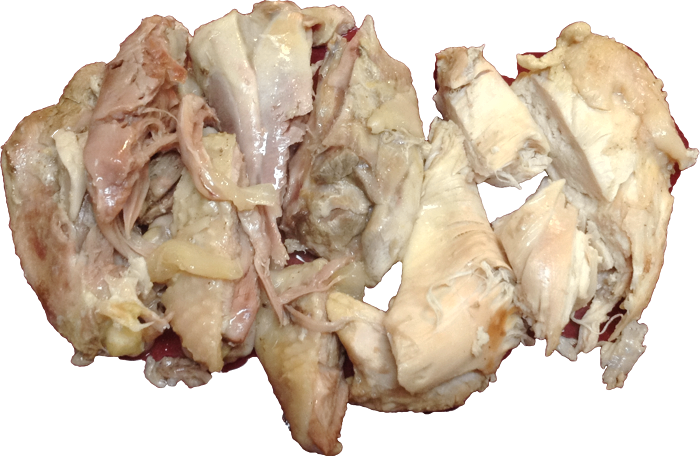
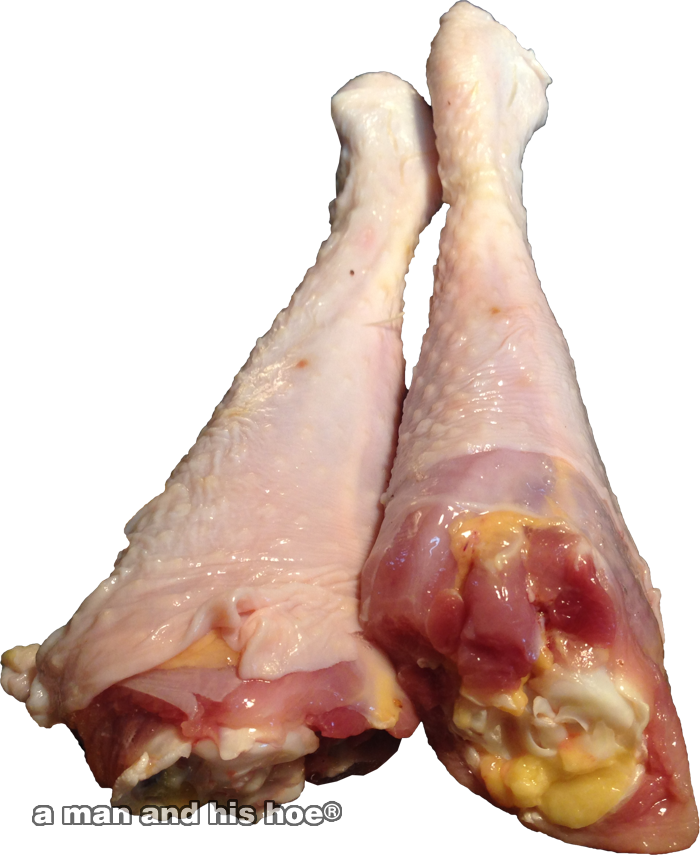
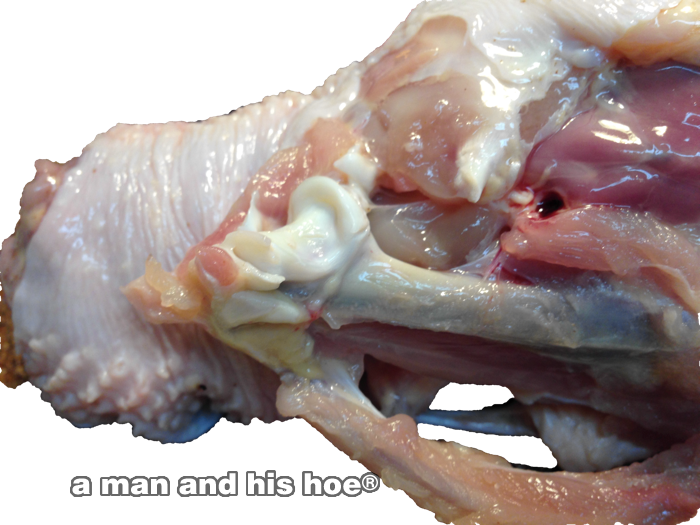
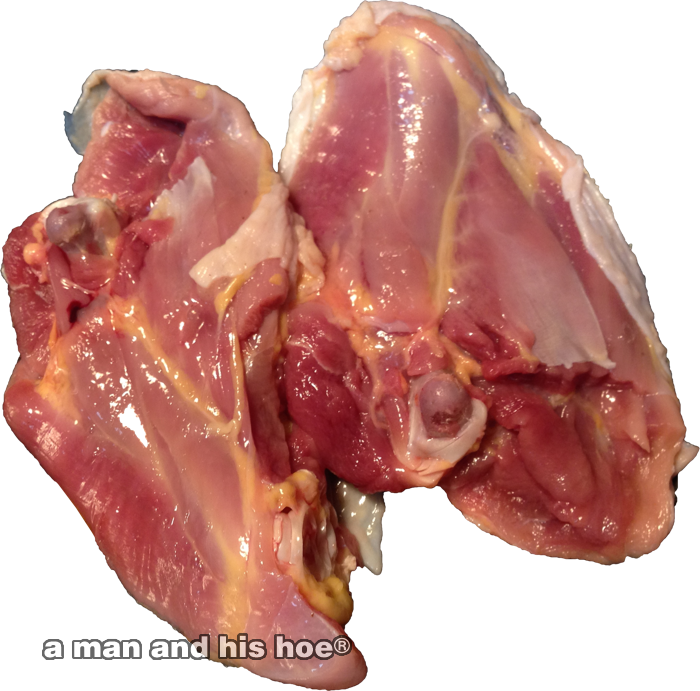
Cut the rooster into drumsticks, thighs, and breasts. Save the wings and the rest of the carcass to make soup.
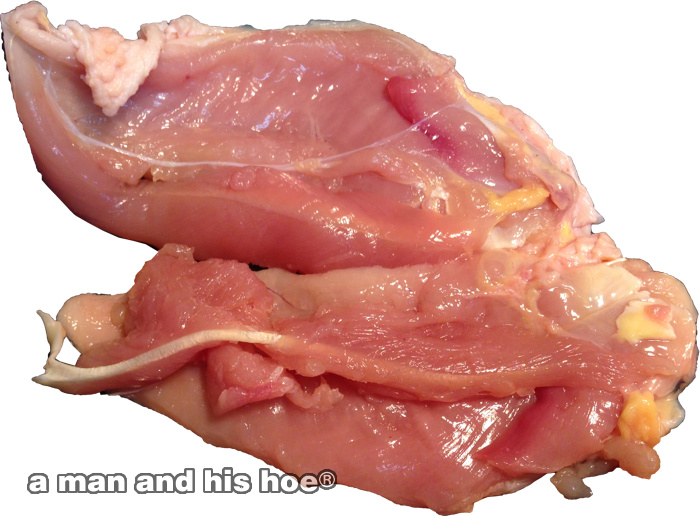
The breasts should be a nice rose color, the bones a shiny alabaster. The skin and meat should have a bright, translucent sheen. The fat should be a pleasing, lemon color. The thighs will be bright red.
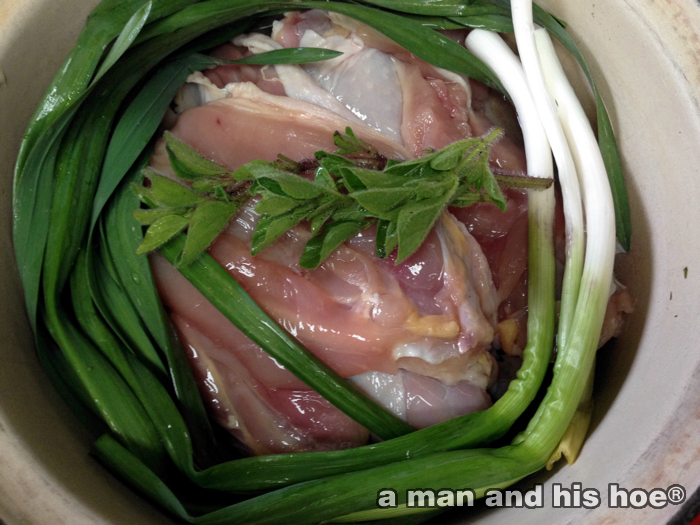
Arrange the pieces of rooster in a heavy pot. Top with the garlic and oregano. Add some sake or white wine so there is a half inch to inch in the bottom of the pot. Cover the pot and put on a very low flame. Let it gently simmer for two hours.
Out will come tender, juicy, tasty meat. Dish up as whole pieces or cut up and serve. Sprinkle with salt if you like.
-
Salad Recipe – Five to Ten Minutes
It’s fresh salad season here at a man and his hoe®, and I thought I’d share a simple salad recipe, one that I make nearly every day.
Step 1: Go into the vegetable garden and fill a salad spinner with leafy greens. There’s no need to pull out an entire plant. Pinch off the leaves you want and leave the plants to keep growing and producing more leaves. Today, I’m using Siberian kale and arugula leaves.
Step 2: Find some herbs, like oregano in your rockery, and add them to the pile of fresh greens.
Step 3: Add some chives to the pile of fresh greens.
Step 4: As well as a few sprigs of mint.
Step 5: Rinse and spin the greens. Chop up the herbs.
Step 6: Pile the greens on a salad plate. Top with the chopped herbs. And finish by drizzling the salad with balsamic vinegar.
There you have it. A fresh salad more delicious than any you’ll find in a restaurant, all for just five to ten minutes of your time. Food the way it was meant to be enjoyed.
-
Making Tofu
What does making tofu have to do with raising chickens? Nothing directly, except that chickens love homemade tofu as much as I do. They also go nuts over okara, a byproduct of making tofu. So do the dogs. Okara is the soybean solids left after squeezing out the soymilk. The soymilk is what is used for making tofu, but okara is an incredible food on its own. It makes fluffy, moist muffins, delicious pancakes and waffles, mixed with ground beef it makes mouthwatering croquettes, or is delicious on its own with a little ginger and soy sauce.
The basics of making tofu are crushing soybeans into a slurry, bringing the slurry to boil, squeezing out the soy milk, heating the soy milk, adding nigari to the soy milk to make it curdle, and then pressing the resulting curds into a block.
I recently learned that a farm on San Juan Island, San Juan Island Sea Salt, is making salt from sea water, and when I heard that, I knew that they also had to be making nigari because nigari is a byproduct of making sea salt. Basically, nigari is what is left when you take the salt out of seawater. It is also called bittern, and is mostly magnesium chloride. Nigari is very bitter. When you taste it, it is so bitter it feels like you are stabbing your tongue with needles. And yet, with their nigari, I detected a sweetness behind the extreme bitterness.
San Juan Island Sea Salt was very gracious to send me a sample of their nigari. When the sample arrived Saturday morning, I made a batch of tofu in the afternoon and was very pleased with the result. Their nigari is a wonderful product and it’s great to know I have a local source for nigari. The pictures below are ones I took of the process when I made tofu this afternoon. If you need more detailed information about making tofu, feel free to contact me.
Things to watch out for:
- If possible, use pure non-chlorinated water to soak the beans and make the slurry. Not an easy thing to do if you have public water. If you have a well with good water, count yourself lucky.
- When bringing the crushed soy slurry to a boil, stir occasionally, and pay very close attention as it nears boiling as it expands greatly and will easily boil over.
- Don’t boil the soy slurry mix long, a few minutes at most. If you boil it for a long time, it will not curdle as well – at least that has been my experience.